
Once you make the switch from designing documents in a regular word processor to using a desktop publishing application, you’ll never go back. InDesign is part of Adobe’s Creative Cloud service and has an incredible number of tools and features.
However, beginners should try these InDesign tips and tricks to start getting more out of this feature-rich app and cut down on the time it takes to create stunning designs.

1. Use the Keyboard to Preview Your Document Quickly
- Pressing the W key toggles between the Normal view, which shows all the margins, guides, and outlines in your document, and the Document view, which hides those elements.
- If you hold Shift + W, you can toggle to Presentation mode.

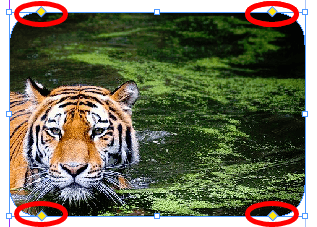
2. Round the Corners of Your Images
After you place an image in your document, follow the steps below:
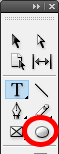
- Switch to the Selection tool (black arrow tool or press V), and you’ll see a yellow square near one of the corners of your image.

- Select the yellow square to go into Edit Mode. A yellow diamond will appear at each corner of the image.
- Drag a diamond to round the corners of your image.
- Hold down Shift while you drag if you want to adjust one corner at a time.
3. Add Page Numbers the Right Way
First, open the master page. Then create a text frame where you want the page number to appear on the page. Select Type > Insert Special Character > Markers > Current Page Number. Format as you see fit.

4. Turn Off Hyphenation
InDesign turns on hyphenation by default. To stop InDesign from hyphenating a word at the end of a line, turn on the Paragraph panel by going to Window > Type & Tables > Paragraph or press Alt + Ctrl + T (Command + Option + T on Macs) and uncheck the Hyphenate box.
This is particularly helpful if you find that your document has a lot of hyphens.

5. Underline Text
To underline text in InDesign, follow the steps below:
Method 1
- Select the text with the Type tool (or press T on the keyboard).
- Press the underline button in the toolbar.
Method 2
- Select the text you want to underline and then go to the Character palette.
- Select the palette’s dropdown menu and choose Underline.

Method 3
- Keyboard shortcut: select the text and press Shift + Ctrl + U.
- Mac users can press Shift + Command + U.
6. Balance Ragged Lines
The Balance Ragged Lines tool will evenly distribute the number of words on each line of a paragraph so that the lines are roughly the same length and look more even.
Follow the steps below:
- Select a paragraph of text.
- In the Paragraphs panel (For Windows > Type & Tables > Paragraphs or Alt + Ctrl + T or for Macs Command + Option + T), select the dropdown menu and choose Balance Ragged Lines.

Below, we’ve used the Balance Ragged Lines tool in the paragraph on the right but not in the original. Note that the line breaks are slightly different, giving the paragraph on the right a bit more symmetry.

7. Don’t Copy and Paste Images
One of the most useful features of InDesign (and other Adobe creative apps) is linking images. Instead of copying and pasting an image, create an image frame and then Place the image in that frame.
- The keyboard shortcut for placing an image in a graphic frame is Ctrl + D.
- Mac users can press Command + D.
If you modify the linked image, InDesign will automatically use the updated version. By contrast, if you were to copy and paste the image, you’d have to paste the new version every time the image changes. Perish the thought!

8. Resize Images in InDesign
Most content in InDesign goes inside a container called a frame. There are two kinds of frames: text frames and graphic frames. You can fit your images to their frames, and you can adjust graphic frames to fit your images.
- To fit an image to its frame, select the frame and then choose Object > Fitting > Fit Content Proportionally. If the image has different proportions than the frame, you’ll end up with some empty space.
- You can select Object > Fitting > Fill Frame Proportionally. The only difference is that if the image and frame have different proportions, then some of your images may be cropped by the frame.
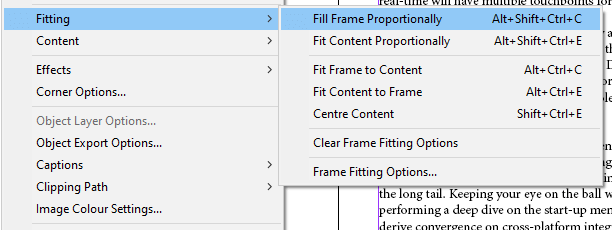
- You can also choose Object > Fitting > Content-Aware Fit. This option will automatically fit the image to the frame considering both the content of the image and the size of the frame.
Note: This option is not available on Windows 32-bit.
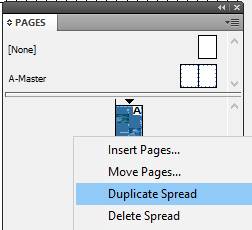
9. Duplicate a Page in a Document
You can easily duplicate a page in your InDesign document by following the steps below:
- Open the Pages panel.
- Hold down Alt (Option for Mac users) and drag the page.
- The page you dragged will be duplicated when you release the mouse button.
- Alternatively, right-click on the page in the Pages panel.
- Select Duplicate Spread. You can use these tricks with master pages, too.
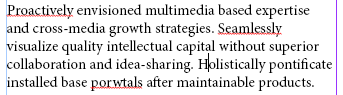
10. See Spelling Errors As You Type
To underline spelling errors, as in Microsoft Word, turn on InDesign’s Dynamic Spelling feature.
- Make sure all your documents are closed.
- Go to Edit > Preferences > Spell Checking (or Spelling depending on your version of InDesign) > Dynamic Spelling.
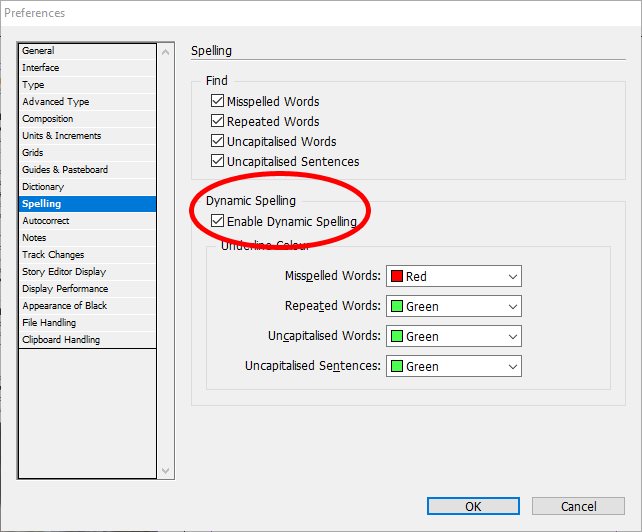
From now on, you’ll see errors in your document underlined with different colors. A red underline means you have a spelling mistake–or InDesign doesn’t recognize the word. A green underline indicates a possible grammatical error.
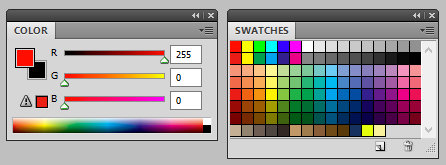
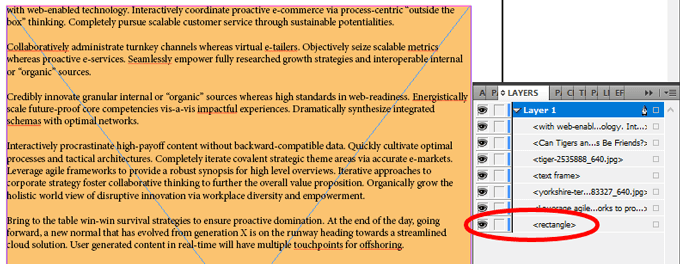
11. Change the Background Color of Your Document
Follow the steps below:
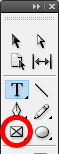
- Use the Rectangle Frame tool (press M on the keyboard) to create a frame precisely the size of the page.
- Use the Color or Swatches panel to select the color you want.
- In the Layers panel, make sure the rectangle frame is behind any other content frames.
12. Draw a Perfect Shape
To create a perfect circle or square, hold down the Shift key while you draw the shape. Use the Ellipse Tool (press L on the keyboard to select) for circles and the Rectangle Tool (M on the keyboard) for squares.
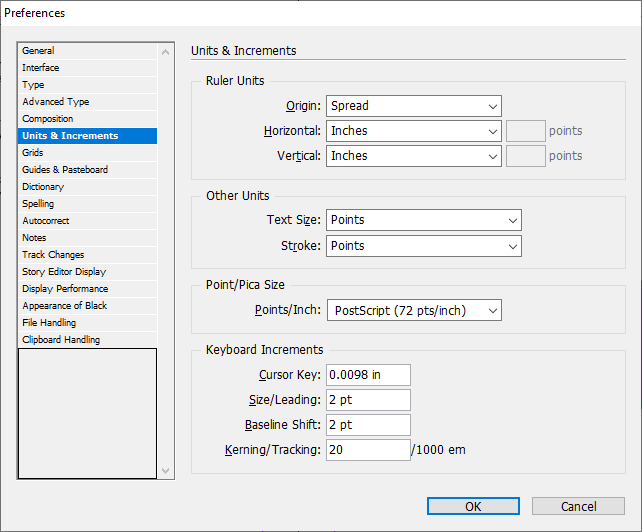
13. Choose Your Units & Increments
Do you think better in metric, or are you a slave to imperial measurements?
Either way, InDesign has got you covered. Head over to Edit > Preferences > Units & Increments. From there, you can choose the measuring unit of your choice, like inches, millimeter, or pixels.
14. Export Your InDesign Document to Microsoft Word
Exporting to Word requires Adobe Acrobat Pro (you can always use their free trial).
- First, export your InDesign document to PDF by going to File > Adobe PDF Presets.
- Choose one of the export options.
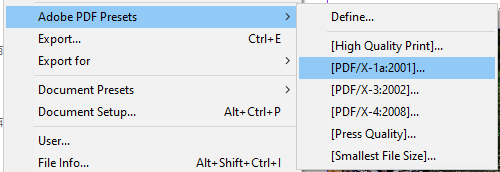
- Open the PDF with Adobe Acrobat Pro and export it to Word by selecting File > Export to > Microsoft Word > Word document. You’ll be able to specify whether the Word doc should retain the page layout or not.
source https://www.online-tech-tips.com/computer-tips/14-adobe-indesign-tips-tricks-for-beginners-to-try/