Windows 10 offers an option to show hidden files and folders that you don’t see by default. Once you enable this option, File Explorer starts displaying all your hidden items.
You can view the hidden files and folders in both File Explorer as well as command-line tools like PowerShell and Command Prompt.
Show Hidden Files and Folders in File Explorer
Follow the steps below to configure File Explorer to show all hidden contents in your directories.
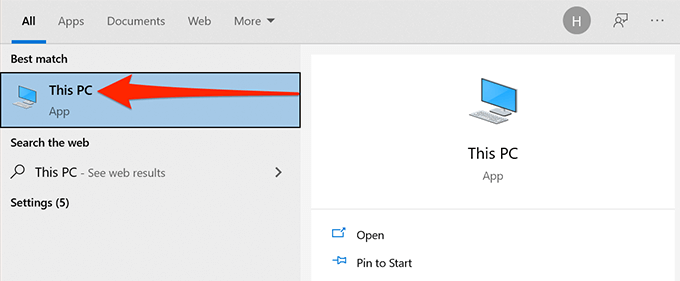
- Open the Start menu, search for This PC, and select This PC in the search results.
- Select the View tab at the top of the This PC window.
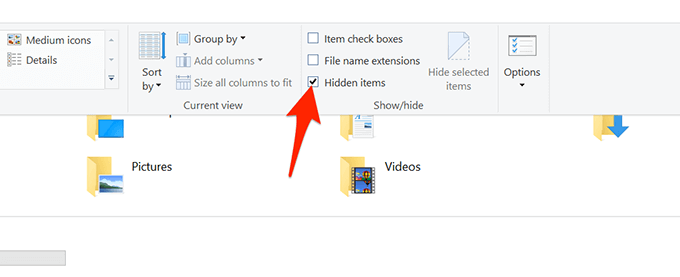
- On the right of your screen, enable the Hidden items checkbox.
- File Explorer will start displaying hidden files and folders on your computer.
- To re-hide your items, deselect the Hidden items box in File Explorer.
Show Hidden Files and Folders From Control Panel
If you prefer the Control Panel, you can use an option in this utility to get Windows 10 to display hidden files and folders.
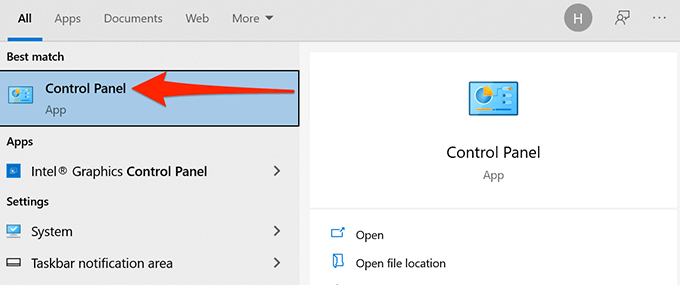
- Access the Start menu, search for Control Panel, and select the utility in the results.
- In the Control Panel, select the menu next to View by and choose Category.
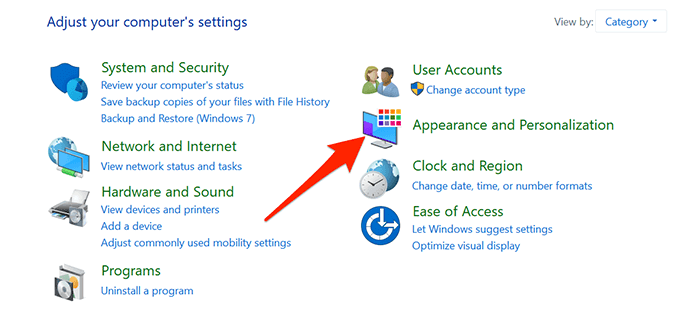
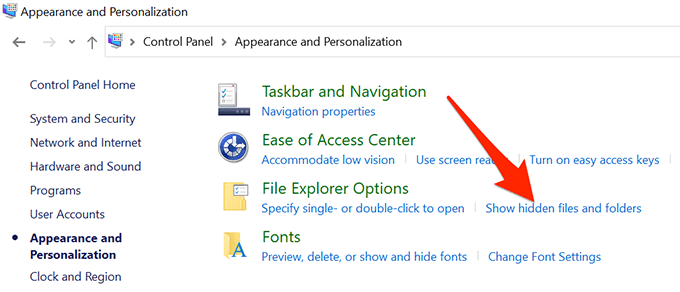
- Select the Appearance and Personalization option.
- Choose Show hidden files and folders under the File Explorer Options.
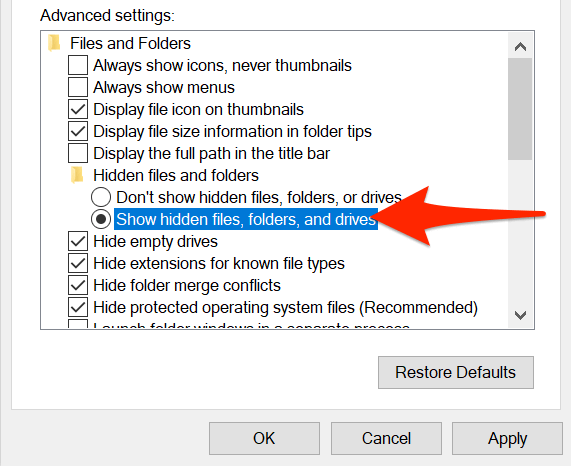
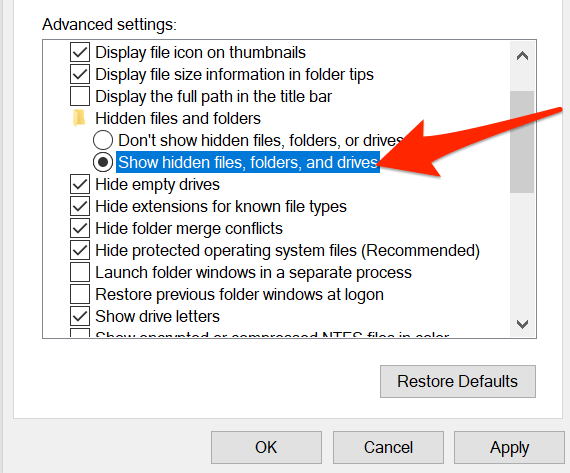
- You’re now in the View tab of the File Explorer Options window. Here, select the Show hidden files, folders, and drives option. Select Apply followed by OK.
- Windows File Explorer will now display all your hidden files and folders.
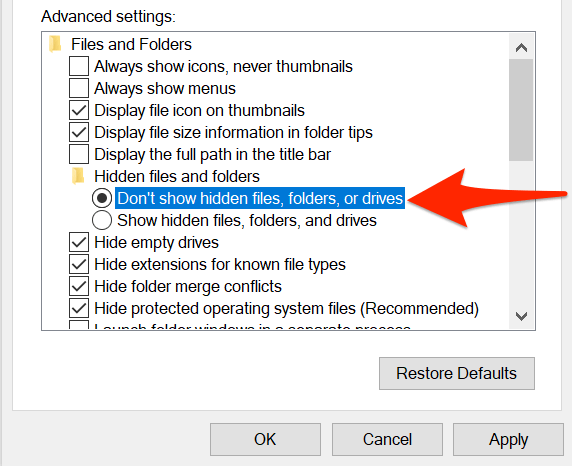
- To hide hidden items, select the Don’t show hidden files, folders, or drives option. Then, select Apply followed by OK.
Show Hidden Files and Folders From Settings
Windows 10’s Settings app also includes the option to show hidden contents on your PC.
To use this method:
- Press Windows + I keys to launch the Settings app or search and select Settings in the Start menu.
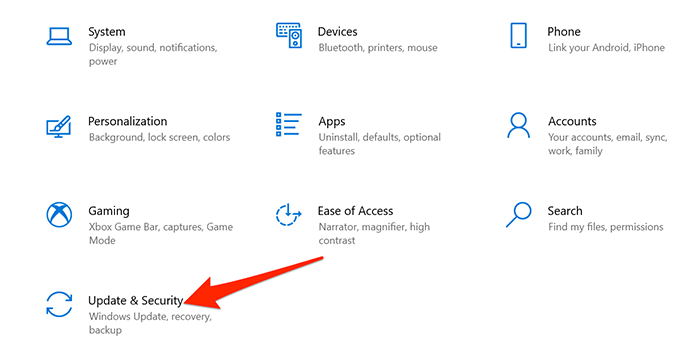
- Select the Home button if you’re not on the main settings page shown in Step 3.
- Select Update & Security.
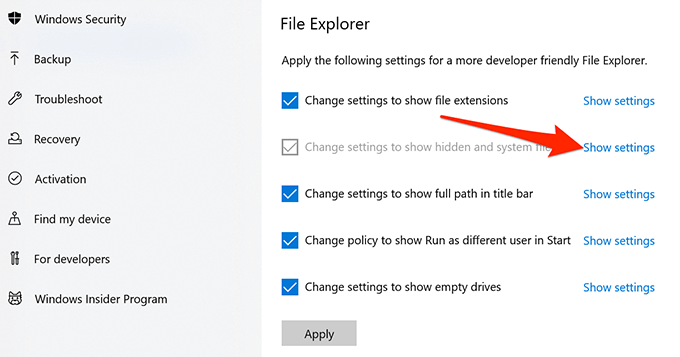
- Select For developers from the left sidebar.
- Scroll down the right pane to Change settings to show hidden and system files. Choose Show settings.
- Enable the Show hidden files, folders, and drives option. Then, select Apply and select OK to save your settings.
View Hidden Files and Folders in PowerShell
If you prefer command-line methods, you can use a command in Windows PowerShell to retrieve a list of all your hidden files and folders.
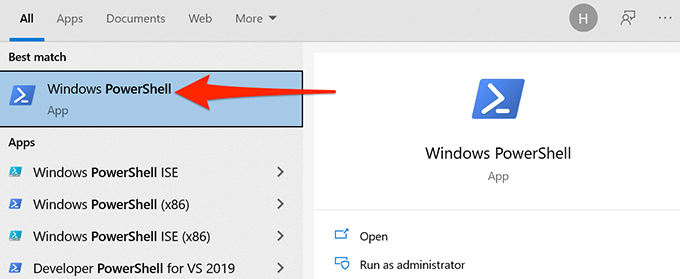
- Click on Start or the Windows Icon on the bottom left and type PowerShell. Select Windows PowerShell from the results.
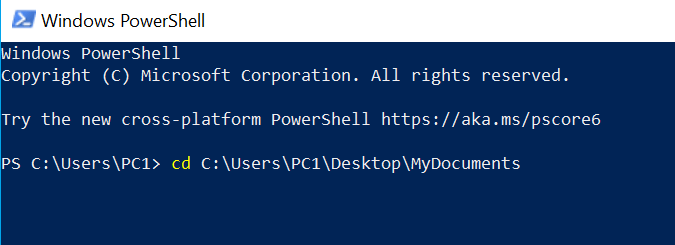
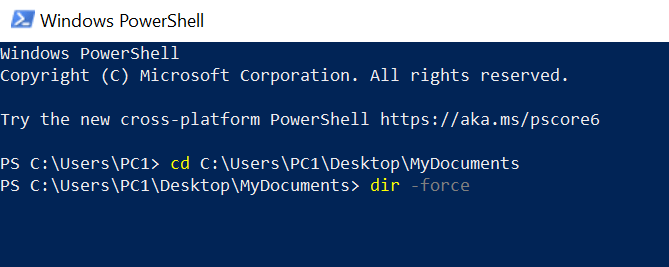
- In the PowerShell window, type cd, type a space, and then enter the full path of the folder where your hidden files are located. For example, if your hidden files are in a folder called MyDocuments on your desktop, you’d use the following command replacing USER with your username. Then, press Enter.
cd C:\Users\USER\Desktop\MyDocuments
- Type dir -force and press Enter. This reveals your hidden files and folders.
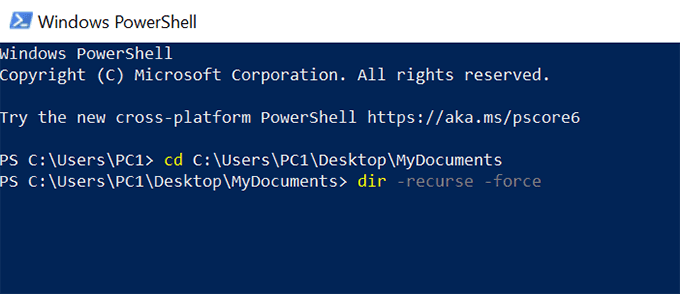
- If you aren’t sure what folder contains the hidden files, type cd, type a space, enter the full path of the folder whose subfolders could have the hidden files, and press Enter. Then, run this command:
dir -recurse -force
- Hidden items in the selected folder and sub-folders should appear in the PowerShell window.
Keep in mind that this method only shows hidden files in a PowerShell window; it doesn’t make hidden items visible in File Explorer.
View Hidden Files in Windows Command Prompt
Another way to view a list of hidden files and folders is to use Command Prompt. Follow the steps below:
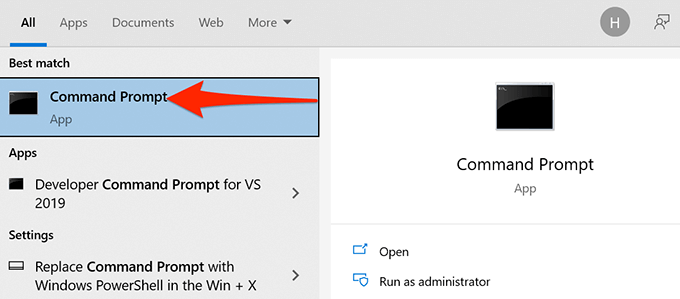
- Press the Windows key to open the Start menu, search for Command Prompt, and select the utility in the search results.
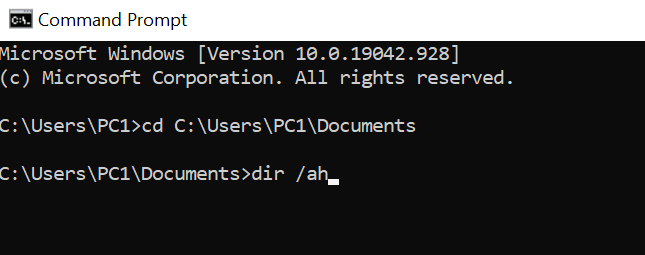
- Type cd, type a space, and then enter the full path of the folder where your hidden files are stored. Then, press Enter.
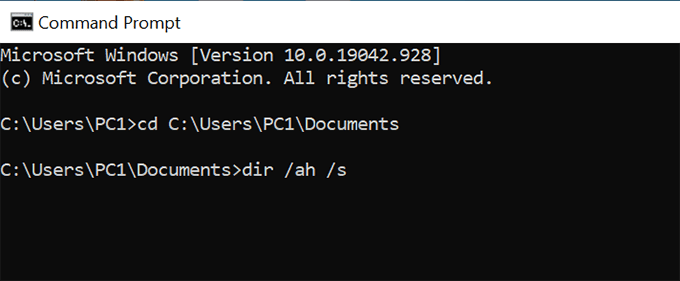
- Type dir /ah to view a list of the hidden files and folders.
- If you don’t know what folder contains the hidden files, you can run a hidden file scan on a parent folder. This will scan all of the subfolders in that main folder. To do this, type cd, type a space, enter the full path of the folder, and press Enter. Then, run the following command:
dir /ah /s
- The Command Prompt window now lists the hidden items from the specified folder and sub-folders.
The above method doesn’t make any changes to File Explorer options and only lists the hidden files.
Show Hidden Operating System Files
There are certain operating system files that won’t appear even if you enable the hidden files option in File Explorer. Follow the steps below to toggle on a separate option to view these hidden OS files:
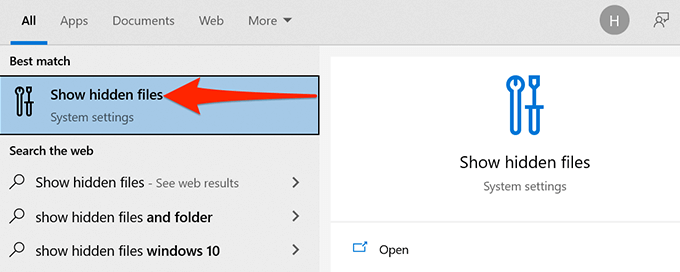
- Press the Windows key to open the Start menu, type Show hidden files, and select that option in the search results.
- Scroll to Change settings to show hidden and system files and select Show settings.
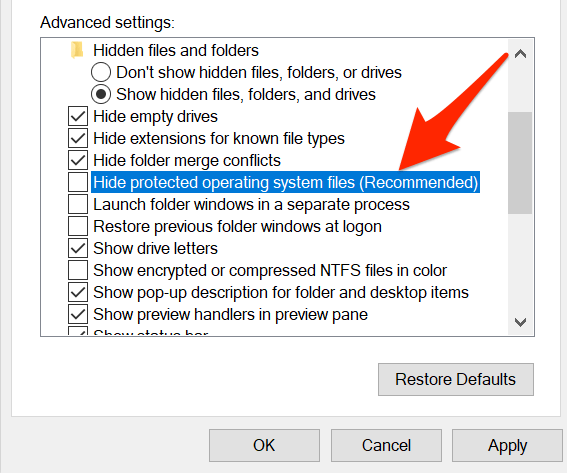
- Scroll down to Hide protected operating system files (Recommended). Uncheck the box for this option.
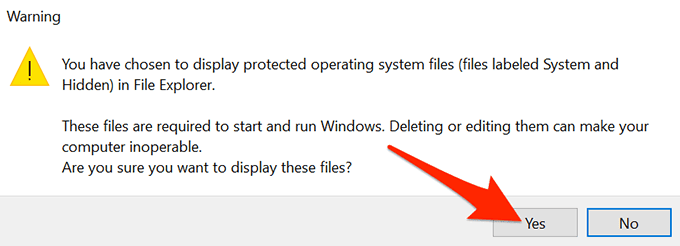
- Select Yes if a warning pops up. Then, select Apply followed by OK.
A Word of Caution
On the internet, many resources may ask you to use the attrib command from the Command Prompt or PowerShell to view your hidden items. It’s generally not safe to change the attribute of a system file as this may have unexpected consequences.
Do let us know, in the comments below, which method worked for you.
source https://www.online-tech-tips.com/windows-10/6-ways-to-show-hidden-files-and-folders-in-windows-10/

