
For more than 2 billion people Facebook is a fun social platform to share their daily experiences.
If you want to share your activities on Facebook, you can easily do this through a Facebook check-in from your device while you’re out and about. The following steps to learn how to check in on Facebook will help you learn this process to identify local places and share what you’re doing with your Facebook friends.

What Is a Facebook Check-In?
Facebook Check-In is a special status update that uses location features to identify places near you and informs people of your whereabouts. Such locations can be as specific as a restaurant or as general as a town or city.
The service is also useful for reassuring your network of family or friends that you’re okay after a natural disaster or even a terrorist attack.
For most Facebook users, the Check-In feature allows others to know where you’ve been or that you’ve arrived at a particular location.

Once you check-in to a particular location on Facebook, it’s not limited to your immediate group of Facebook friends. Anyone on Facebook can view your check-in because it’s connected to a Facebook Page, and all Page activity is public.
You can use the check-in feature to promote your favorite location or business including schools, parks, museums, and theaters. For businesses, the feature offers potential customers valuable information about your business and gives you the chance to promote offers like merchandise sales or customer discounts.
How to Check In on Facebook on a Web Browser
Whether you’re at the beach, in your hotel room, or just at home sitting in front of your computer, you can check into Facebook using a few simple steps.
- To get started, sign in to your Facebook account and select start a new status in the What’s on your mind field.
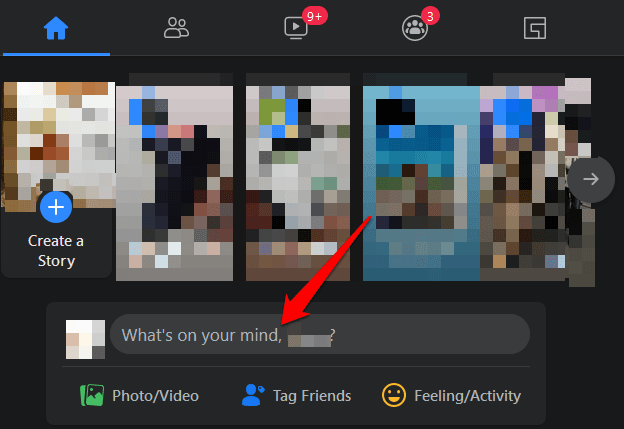
- Select Check In from the menu at the lower right side of the status bar in the Create Post popup.

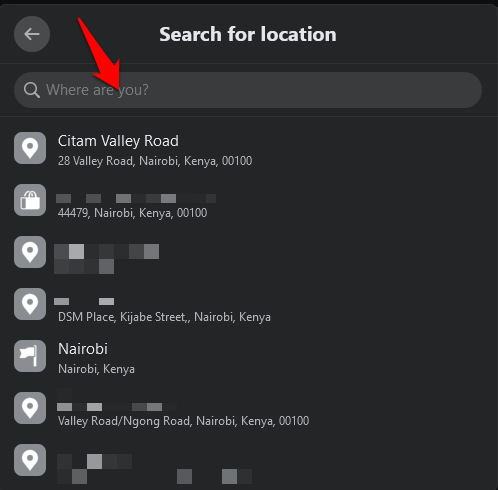
- In the Search for Location window, enter a location or select it from the drop-down menu.
- Select the image/video, friends, feeling/activity, or gif icons if you want to add these to your post.
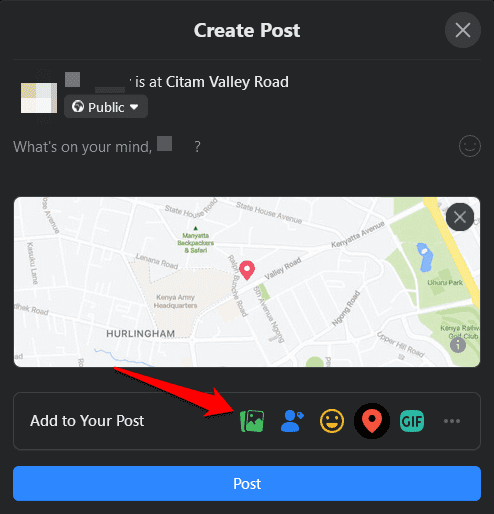
- Select Post to check in on Facebook.
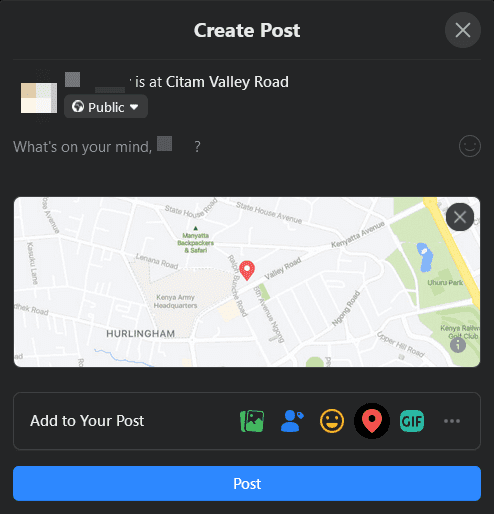
Note: You can add photos, tag your family or friends, or enter some text into your post just as you would with regular status updates, and then hit Post to publish it.
How to Check In on Facebook Using the Android or iOS App
If you have the Facebook app on your Android or iOS device, the interface is slightly different, but the same steps apply when checking in.
- Open Facebook and sign in to your account on your phone. In the What’s on your mind field, tap Check In (red location marker icon).

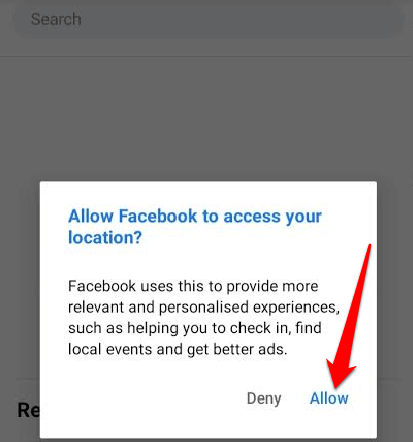
- Enable Facebook to access your current location for better accuracy. Select Allow in the Location permissions prompt.
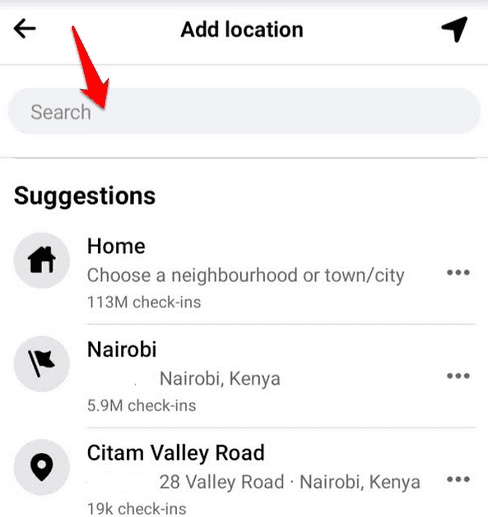
- Enter your location or select it from the drop-down menu.
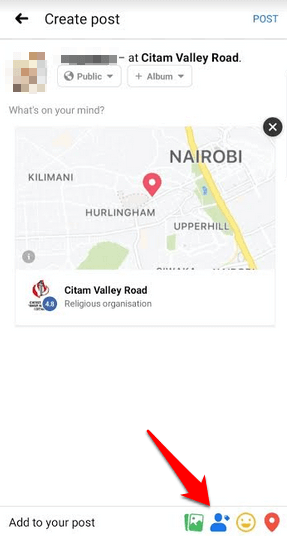
- If you want to tag your friends in your Check-In, tap their names and then tap Done. You can also add a photo/video, feeling or activity to your post. If you prefer not to tag anyone, skip to the next step.
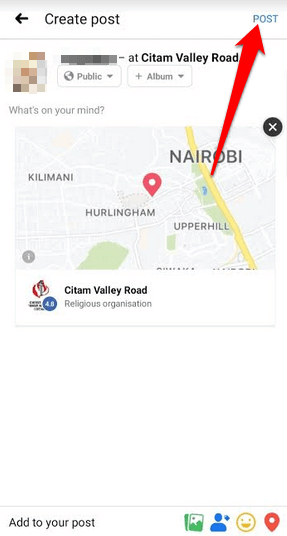
- Tap Post to share your check-in once you’re done.
How to Share Your Location with Friends on Facebook
If you value your privacy and only want to share your check-in location on Facebook with friends, you can use the Nearby Friends feature. The feature is only available on Android and iOS devices and requires your Location History to work on Facebook.
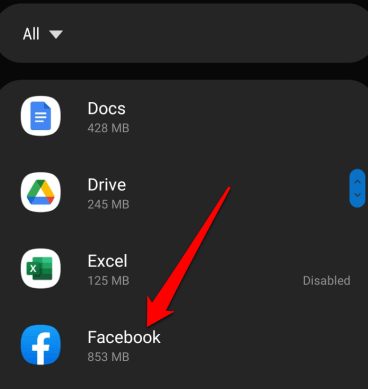
- To enable Nearby Friends, open the Facebook app on your device and turn on Location Services and Background Location. To do this on your Android device, tap Settings > Apps and then tap Facebook.
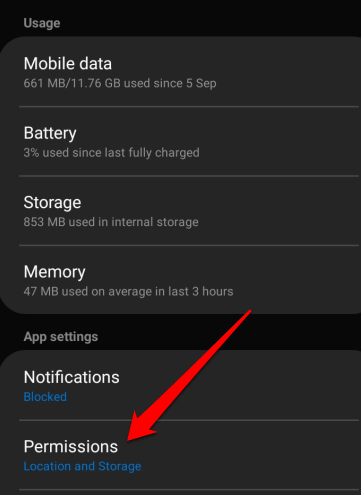
- Tap Permissions.
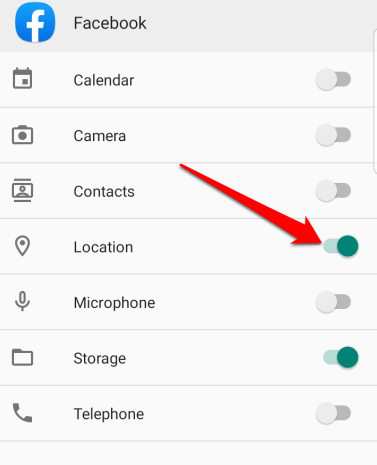
- Next, tap the Location switch to toggle Location Services on.
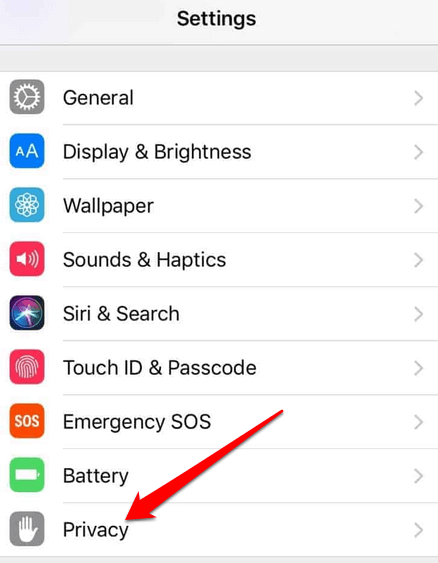
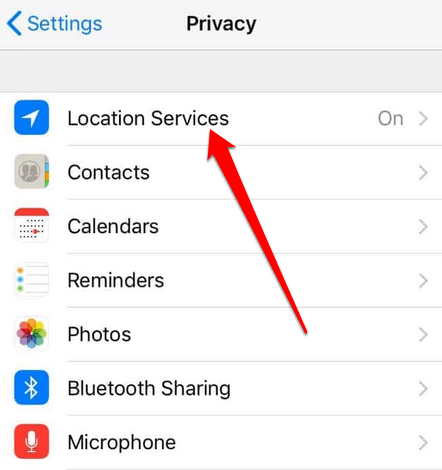
- On your iOS device, open Settings > Privacy.
- Tap Location Services and then tap the Location Services switch to toggle it on.
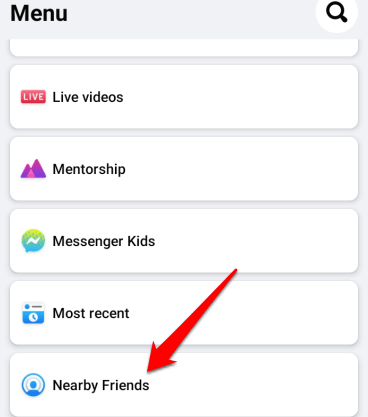
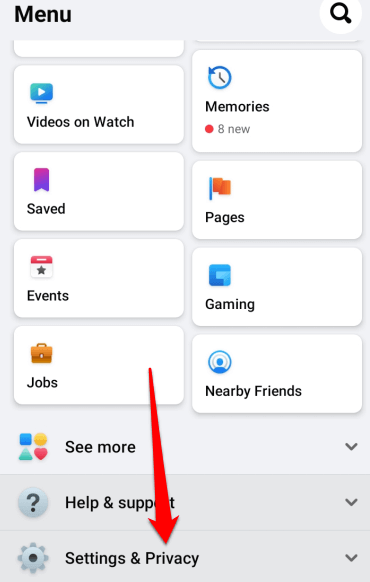
- Next, select the Facebook menu at the upper right side of the screen. Tap See More > Nearby Friends.
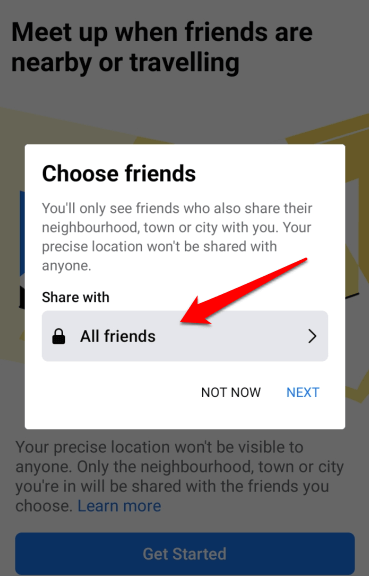
- Select which friends you’d like to share your location with and then follow the prompts to complete setting up Nearby Friends.
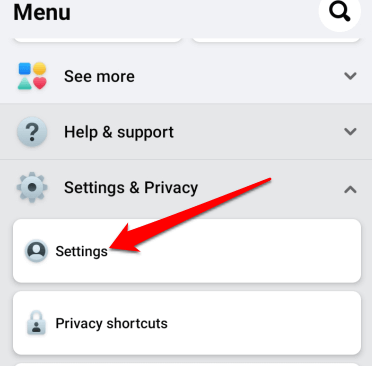
Note: You can turn on push notifications to know when your friends are nearby. To do this, tap the Facebook menu, tap Settings and Privacy.
- Next, tap Settings.
- Tap Notification Settings. From here, you can adjust how you receive notifications including Nearby Friends.

How to Find Your Check-Ins Map on Facebook
The Check-Ins map is a replacement for the previous interactive Where I’ve Been map app for Facebook.
To review your check-ins, go to your About page and find the Check-Ins map. If it’s not there, it means it’s not enabled.
To enable the Check-Ins map on Facebook, go to your profile page and select More > Manage Sections, check the box next to it, and select Save.

How to Mark Yourself as Safe on Facebook During a Disaster
In a public crisis like a natural disaster, terrorist attack, pandemic, or collapsed building, you can mark yourself as safe or check if others are marked safe on Facebook. This way, your family and friends can know that you’re okay, and you can check on them, too.
Marking Yourself Safe in a Browser
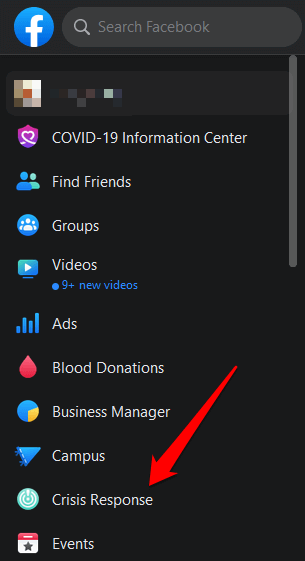
- If you’re using Facebook in a browser, go to Explore and select See More > Crisis Response.
- Choose the crisis or event affecting your area. You can also select the Most Active or your location’s tab.

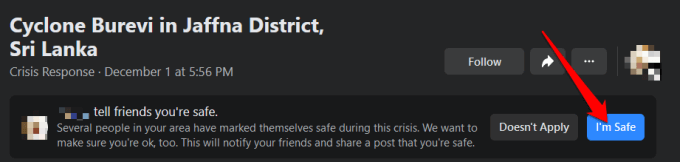
- Select the crisis and then tap the blue I’m Safe button to notify your friends that you’re safe.
Marking Yourself Safe in the Facebook App
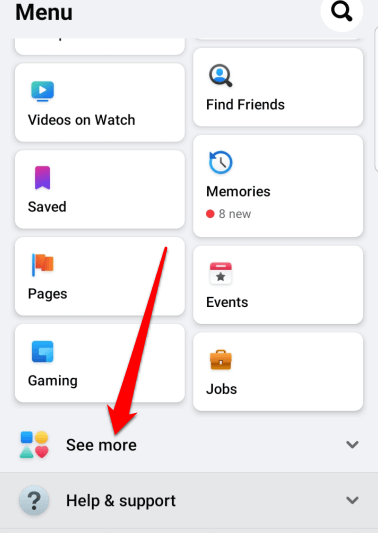
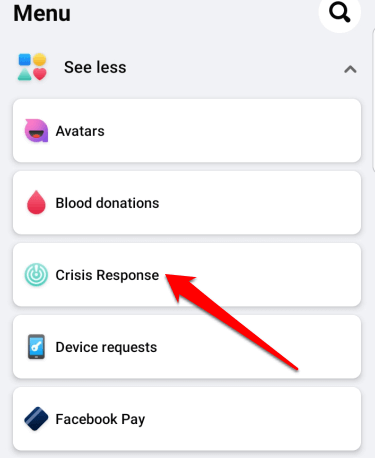
To mark yourself as safe on the Facebook app, open the app, tap the menu and select See more.
- Tap Crisis Response and then tap the crisis or event affecting your area.
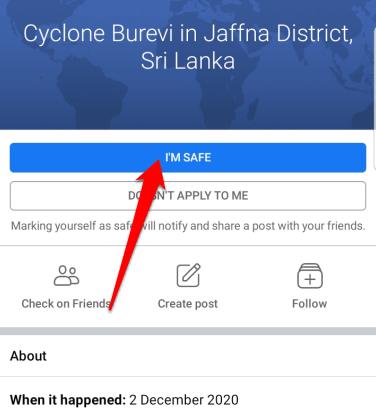
- Next, tap the blue I’m Safe button.
How to Delete a Check-In on Facebook
Unfortunately, Facebook has no way of undoing a check-in that you added to a post. The only way to remove a check-in you no longer want to appear in your profile is by deleting the post in its entirety from your timeline.
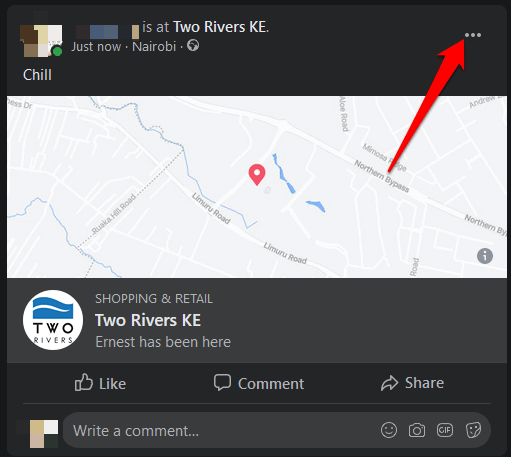
- To remove a post from your timeline, select your profile picture at the top right side of the Facebook screen, find the post and select the three dots at the top right.
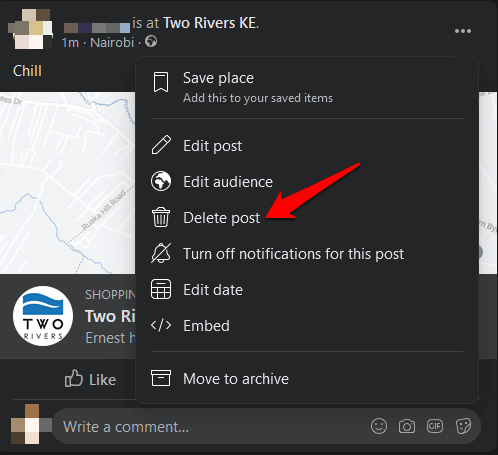
- Select Delete post to remove the post from Facebook completely, or Hide from timeline to remove the post only from your timeline.
Share Activities with Your Friends
Whether you’re using the Facebook app or a computer, checking in on Facebook is a great way to let your network know about your location and activities. The best part is that the whole process takes a minute or less.
Were you able to check-in on Facebook using the instructions above? Tell us about it in the comments.
source https://www.online-tech-tips.com/computer-tips/how-to-check-in-on-facebook/