
Roll20 is an easy way to play DND with your friends regardless of geographic location. But the platform can be complicated and hard to understand. If you’re the Dungeon Master, you already have your work cut out for you organizing and running the game.

This guide will show you how to create a campaign in Roll20, tell you where to purchase additional content, how to invite players to your game, and much more.Also, be sure to check out our guide on how to use dynamic lighting in Roll20.
How to Create a Roll20 Campaign
When you decide to host a game of your own, you can choose the world, the adventure, and much more. Playing as a Dungeon Master is just as rewarding as being a player.
Here’s how to create your first campaign.
Log in to Roll20. On the welcome screen, you will see all your recent games—both those you’ve hosted and those you’ve played in.
Near the top of the screen, click Create New Game. You can make a new game simply by assigning it a name and a few identifying tags to help find them in searches later, but it’s better if you flesh out the information a bit more.
Under Name & Tags, enter the name of the campaign. If you aren’t sure what tags to use, try to think of the best words to describe your campaign. As you begin typing, the system will suggest tags.

Underneath Optional: Choose a Character Sheet, click the drop-down box. Roll20 supports numerous games besides DND, but for the sake of this example, choose D&D 5E by Roll20. A preview of the character sheet will appear when selected.
On the right side of the screen is the Optional: Choose a Module heading. Modules are games that have already been built and provide all the information you will need, including monster stats, maps, and much more. This is one way to select adventures you have already purchased.
If you want to keep this as budget-friendly as possible, choose one of the free modules to get a feel for the platform. If you have something else in mind, skip the modules and click I’m ready, Create Game!
How to Add Content
After you create the game, you will see its home screen. From here, you can choose to launch the game or add more content, invite players, and change specific settings. You can also create discussions around the game and schedule the next session.
The first time you launch the game, it will take longer to load while Roll20 adds all of the content to the platform. Subsequent launches will be faster.

Scroll down to and click the Game Addons header. This will show a drop-down box where you can add more content, as well as a list of all addons currently in your campaign. If you did not choose a module during game creation, you can select one here. Click the drop-down box and select the content you want, then click Add to Game.
It will take up to several minutes for the content to install, but once it does the page will refresh. When you launch the game, the newly-added content will be available.
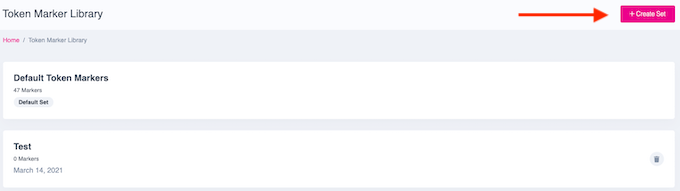
You can also choose to change your in-game markers. Click the + symbol beside Token Marker Sets to add additional markers. If you do not have any, click Create New Set, give it a name, and upload the images you wish to use.
Token markers are icons used to denote status ailments and other important information during the game. The default set is helpful, but if you’re playing a custom campaign it can help to set your own tokens.
How to Invite Players
The most important element of any DND campaign are the players. You can’t have a game without them, no matter how much content you might have. Thankfully, inviting players is easy—and you will never have trouble finding someone to play with online.

To the right of the screen, click Invite Players. A pop-up appears where you can enter individual email addresses. It will show anyone that has received an invite and has not yet accepted. However, the easiest method is often to copy and paste the Share Link so anyone that clicks it can join your campaign.
Most campaigns are designed for four players, although you can have as many as you want. Above six players (not including yourself), the game begins to take a long time between turns, so be aware of how many people you invite to join.
Understanding Game Settings
Roll20 has an extensive settings menu. It would need a guide all its own, but there are a few settings you should be aware of. The first is whether or not to allow players to import characters.
If your campaign is a one-shot and you want to bring in higher-level characters from other adventures, you can choose to allow players to import existing characters from other adventures. This saves the trouble of creating all-new characters for an adventure that will only take a few hours.
The next setting you should change deals with movement.
Under Game Default Settings, scroll down until you find the Emits Light subheading. Click Has Sight and then Save Defaults. If you don’t do this, players will be able to see their assigned character tokens, but nothing else.

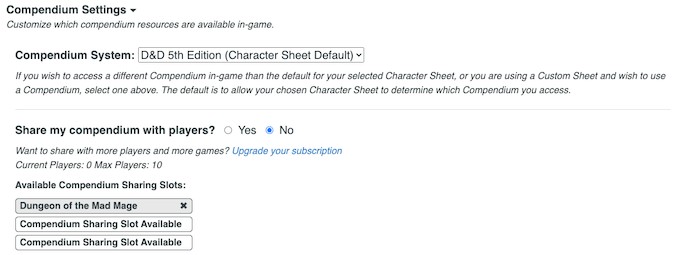
The final essential setting is under Compendium Settings. If you own the Roll20 version of the 5E Player’s Handbook or other resources, you can share them with players. This allows players to drag and drop spells onto their character sheet instead of manually entering the data.
It is a tremendous time saver, especially when new characters are needed. You can share your compendium with up to 10 players depending on your subscription.
Create Your First Campaign to Make Gameplay Easier
It’s complicated, but creating a campaign in Roll20 is the safest way to play DND right now. It’s also convenient, as you aren’t coordinating schedules throughout the day. While it lacks some of the charm of in-person gaming, it’s still a great way to catch up with friends and embark on exciting adventures.
source https://www.online-tech-tips.com/gaming/how-to-create-a-roll20-campaign/