
Are you having trouble sharing an image because the file size is too large? That’s a common issue that we all experience from time to time. Luckily, you can reduce the file size of your pictures using various ways.
You can compress your images, change your image resolution, or remove the metadata from your images to reduce the file size.

Compress the Image Size with Online Tools
There are several online tools that you can use to reduce the file size of your images. You don’t need to install anything on your PC to use these tools. They work on your web browser.
1. Use TinyPNG to Compress Images
TinyPNG (free) is one of the popular web-based tools to compress images. With this tool, you just need to upload your images and the tool compresses those images for you. You can compress a single as well as multiple images at once with this tool.
Although the site name mentions PNG, the site works for JPG images, too.
- Access the TinyPNG site in a web browser on your computer.
- When the site loads, select the upload icon in the middle to upload your photos.
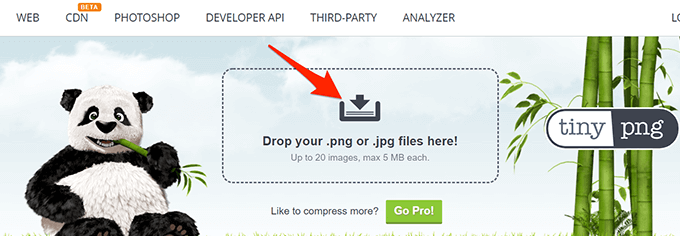
- Upload the photos that you want to compress. Remember you can upload as many as 20 images in one go.
- When the photos are uploaded, TinyPNG will start compressing them.
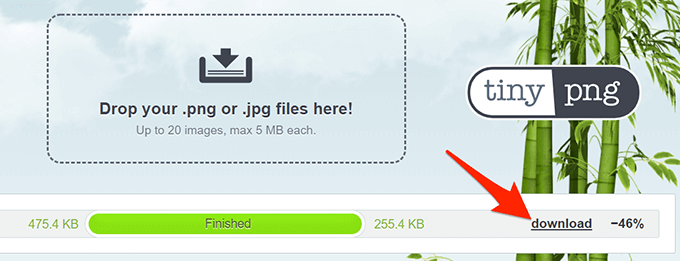
- If you’ve uploaded a single photo, select Download next to the photo name to download the compressed version of your photo.
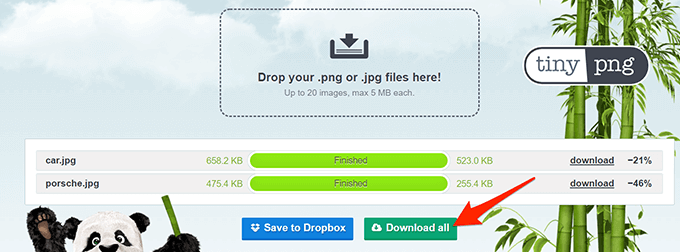
- If you’ve uploaded multiple photos, select Download all to get a ZIP archive containing all your compressed photos.
2. Use Image Smaller to Reduce the Image File Size
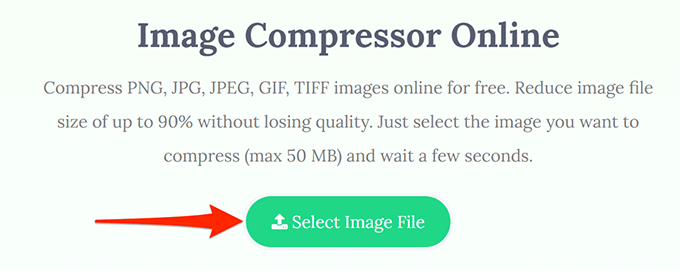
Image Smaller (free) is another site that allows you to reduce the size of your images on the web. This site supports several image formats, including JPG, PNG, GIF, and TIFF. You can upload images up to 50MB in size.
- Open the Image Smaller site in a web browser on your computer.
- On the site, select Select Image File and choose the image or images to compress.
- Wait for the site to reduce your image’s size.
- When the image is compressed, select Download to download the compressed image.
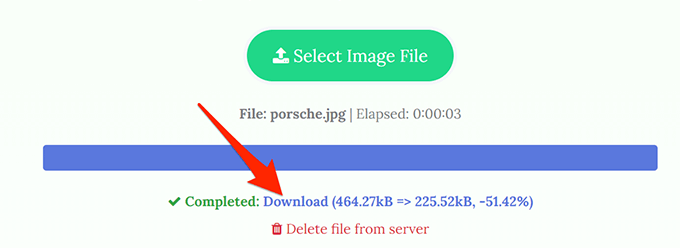
The download page shows your image’s original as well as compressed size. This way you know how much your image has been compressed.
3. Use Kraken to Reduce the Picture File Size
Most Kraken services are paid, but you can use its image resizer with certain settings for free. These free settings are good enough to reduce the size of your images without any issues.
To use Kraken to compress images:
- Open the Kraken site in your web browser.
- From the Select optimization mode section, choose Lossless. This is to ensure your image is resized without too much impact on the image quality.
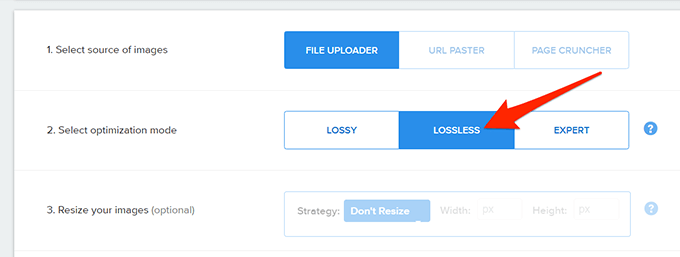
- Select the upload icon and upload the image you want to compress.
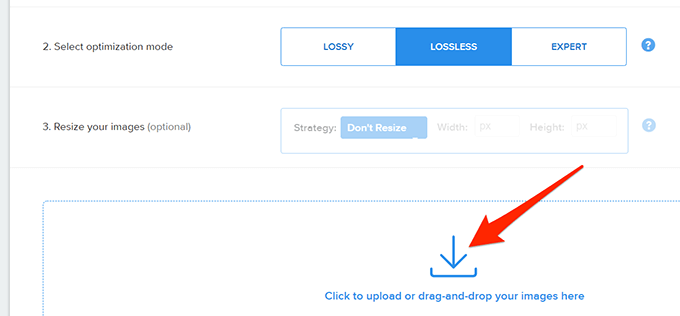
- Kraken will start compressing your image. You’ll see the progress bar at the bottom of the site.
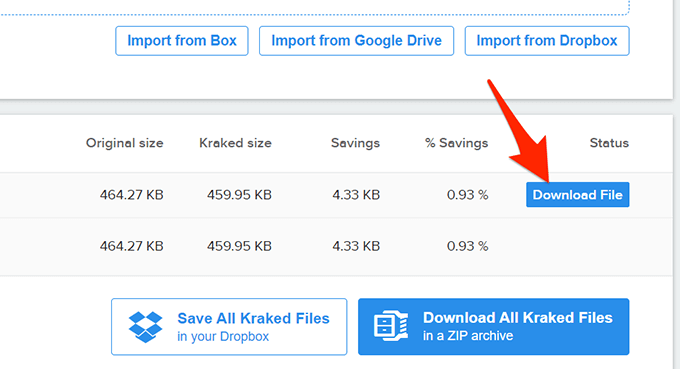
- When your image is fully compressed, select Download File to download the image to your computer.
Change the Image Resolution to Reduce the Image Size
Another way to reduce your image’s size is to change the image’s resolution. This can have an impact on the quality of the image.
On Windows 10, there are multiple ways to change an image’s resolution.
1. Use Paint to Change an Image’s Resolution
You can use Windows 10’s built-in Paint app to change the resolution of your images. This way, you don’t need to download or install any third-party apps on your PC.
- Open the folder containing the image you want to reduce the size for.
- Right-click the image and select Open with > Paint.

- When the image opens in Paint, select Resize at the top.
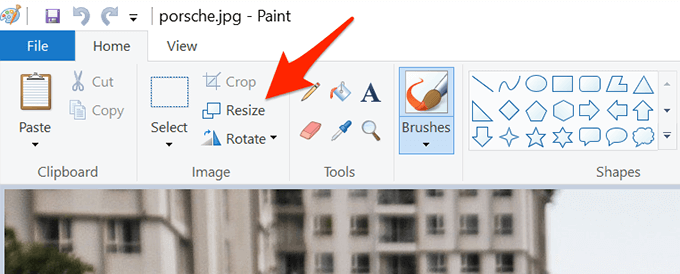
- In the Resize and Skew window that opens, select Pixels from the Resize section.

- In the Horizontal box, enter the new width of your photo in pixels. Remember this should be smaller than the current width.
- You don’t have to specify anything in the Vertical field as it’ll automatically get the right dimensions based on the Horizontal field’s value.
- Select OK at the bottom of the window to save your changes.
- Select File > Save as and choose an image format to save your compressed image.

2. Use Shutterstock to Reduce an Image’s Size
Shutterstock is known for its stock photos repository. Besides offering thousands of stock photos, the site offers an online image resizer (free), too.
You can use this online tool to change the resolution of your images, making your images smaller in terms of file sizes.
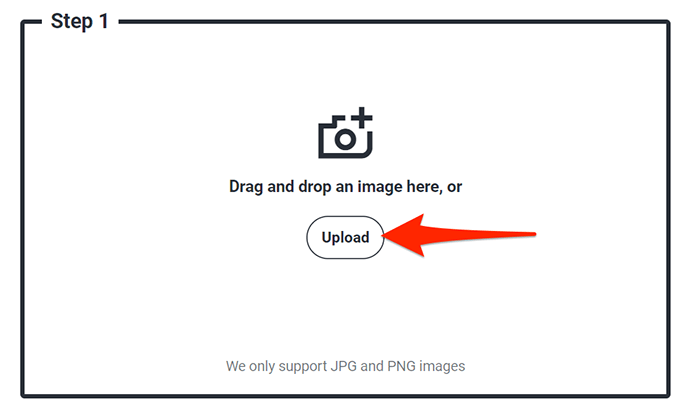
- Head over to the Shutterstock Image Resizer site in your web browser.
- On the site, select Upload and choose the images you’d like to compress.
- In the Step 2 section on the site, select the Select an image size dropdown menu and choose a new resolution for your photo.
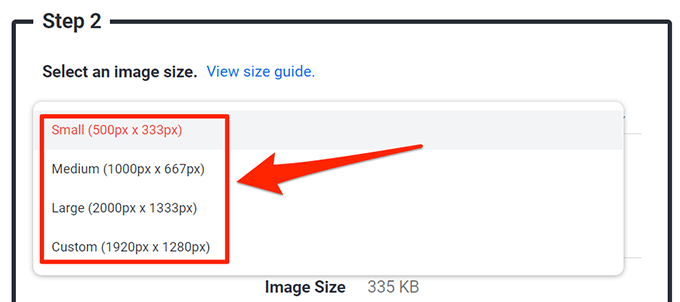
- To specify custom dimensions, select Custom from the dropdown menu and then enter the custom width and height of the photo in the given boxes.
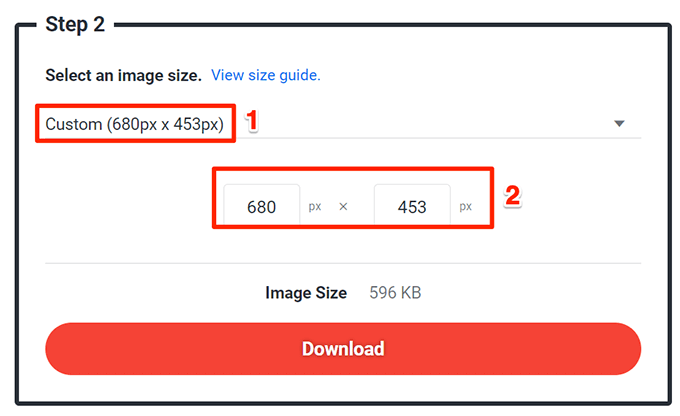
- Lastly, select Download to download the resized image to your computer.
Use Adobe Photoshop to Compress an Image
If you use Adobe Photoshop on your computer, there’s an option in this program that lets you selectively reduce the size of your images.
You have multiple quality and file size options to choose from with Photoshop.
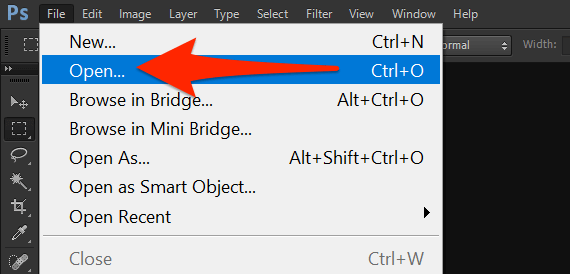
- Launch Adobe Photoshop on your computer.
- Select File > Open and load the photo you want to reduce the size for.
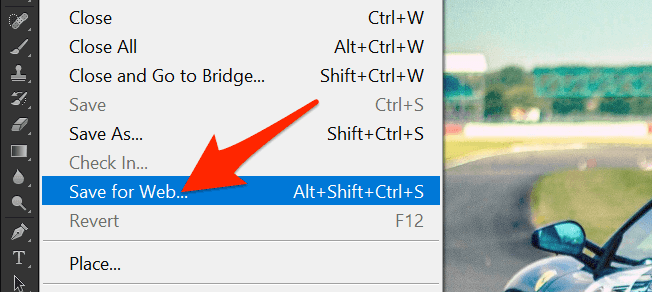
- Once the photo opens in Photoshop, select File > Save for Web from Photoshop’s menu bar.
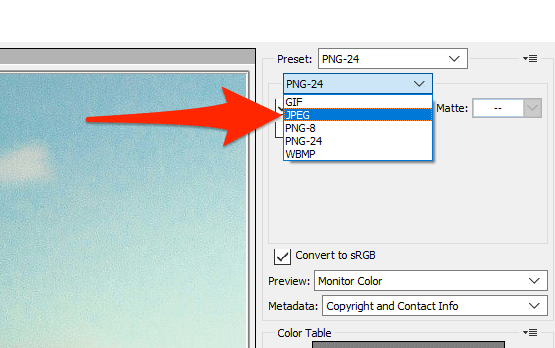
- At the top-right corner of the Save for Web window, select the dropdown menu right beneath (not next) Preset and choose JPEG.
- Select the dropdown menu below JPEG and choose Medium.
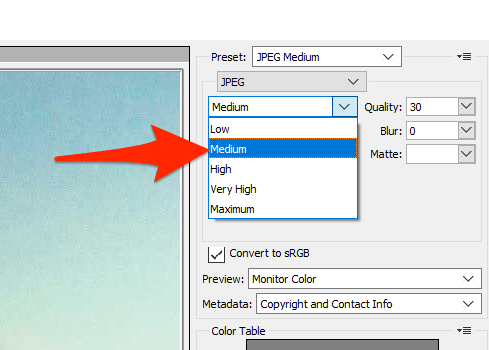
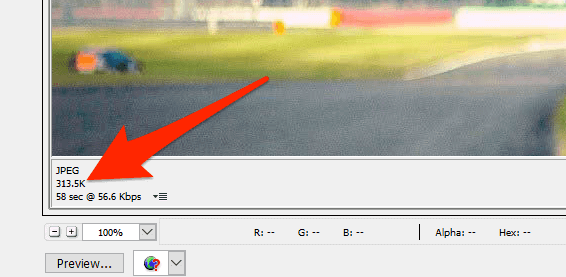
- At the bottom of the photo preview on the left pane, you’ll see the size of your photo with the current settings applied.
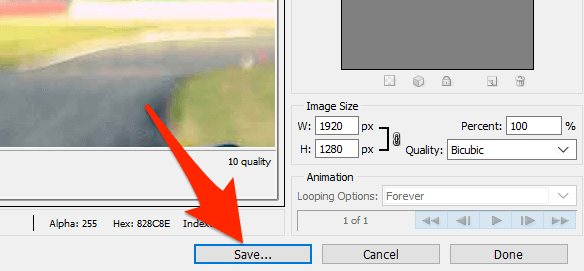
- If this file size is still too large, select Low from the menu where you chose Medium.
- When you’re happy with the results, choose Save at the bottom.
Remove Image’s Metadata to Reduce the File Size
Many of your images have certain information saved in them. This information is called metadata and this usually includes details like the name of the camera that was used to capture the image, various camera settings when the photo was captured, and so on.
If you don’t intend to use this information, you can remove this information which will reduce the file size of your image. Note that you won’t see a significant difference in your image’s file size, as the metadata usually doesn’t use too much space.
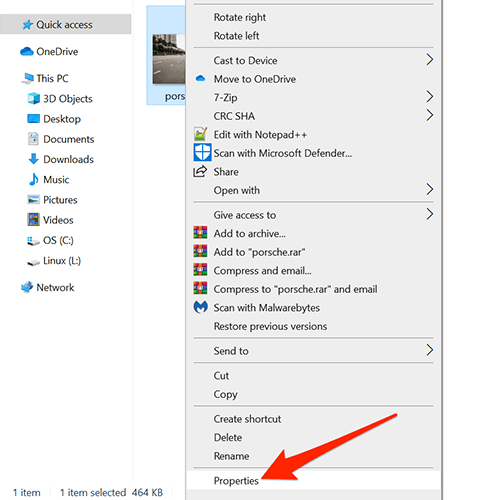
- On your Windows PC, right-click the image for which you want to reduce the file size and choose Properties.
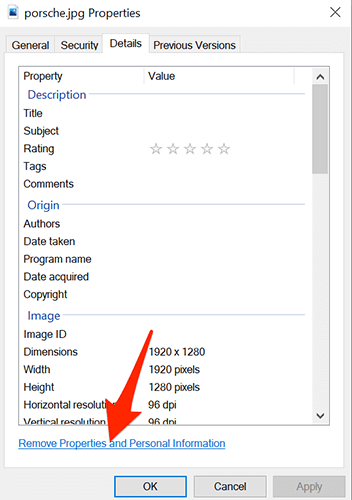
- Select the Details tab in the Properties window.
- At the bottom of the Details tab, select Remove Properties and Personal Information.
- On the following screen, choose Create a copy with all possible properties removed and select OK at the bottom.
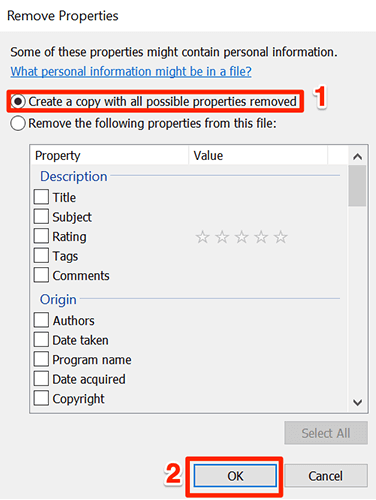
- Windows will create a copy of your image in the same folder as the original image. This copied version of your image has all the metadata removed from it.
With various methods outlined above, you can quickly and easily reduce the file size of any of your images. You can either use web-based tools if you don’t like installing apps, or use installable programs to compress your images.
source https://www.online-tech-tips.com/computer-tips/how-to-reduce-the-file-size-of-an-image-or-picture/