
Being active on social media sites like Facebook or Instagram can be a rewarding way to stay in touch with friends and acquaintances.
Social media sites are made for sharing, but chances are you’ve seen this comment on someone else’s post: “Is it okay for me to share your post? Can you make it shareable?”
This happens when a post hasn’t been made public. In other words, if the privacy settings on the original post are set to “Friends Only,” then that post will lack the Share button. Fortunately, adjusting the privacy settings to allow sharing on a Facebook post is easy, and we’ll show you how below.

How to Allow Sharing on Facebook Posts
There are two main ways to allow sharing on Facebook. You can either make a specific post shareable, or you can change your default Facebook timeline privacy settings so that all your future posts are made public.
First, let’s run through how to make a specific post shareable, either on a computer or on Facebook’s mobile app.
How to Allow Sharing on Facebook on a Computer
Setting your Facebook post’s audience to public will make your post shareable.
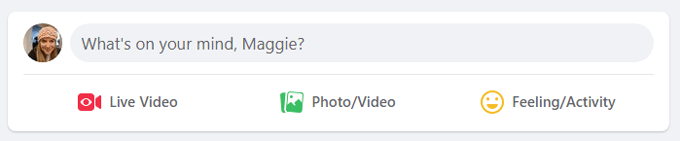
- From Facebook’s homepage on a computer, click into the “What’s on your mind” field or select the Create button with the plus sign next to your profile pic in the top-right corner, and then select Post.

- Note the post’s audience. Privacy/audience settings appear directly underneath your profile name in the Create Post popup. Depending on your default settings, the audience for your post might already be set to public.
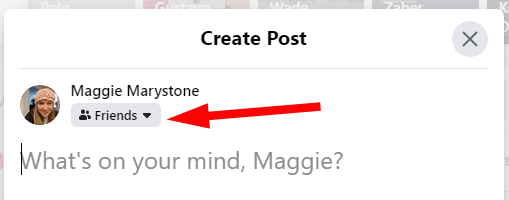
- Click on the dropdown arrow to select your audience.
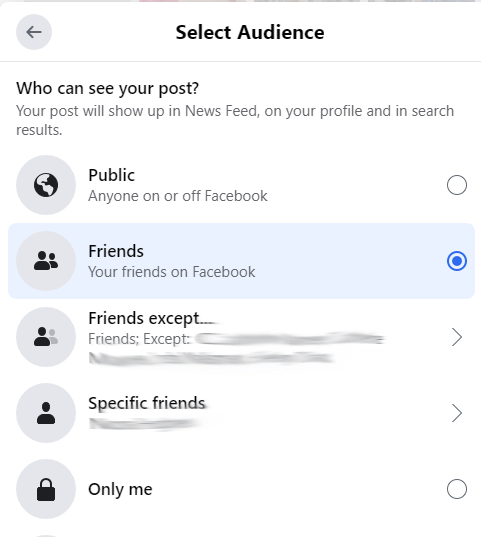
- If you want your post to be shareable, select Public for your audience.

- Verify that your post is public by looking for the globe icon on your post. Note also that the Share button appears below your post.

Now you’re good to go. Anyone on Facebook will be able to view and share your post.
How to Allow Sharing of Your Facebook Post on Mobile
Setting your post’s audience to Public is just as easy on mobile.
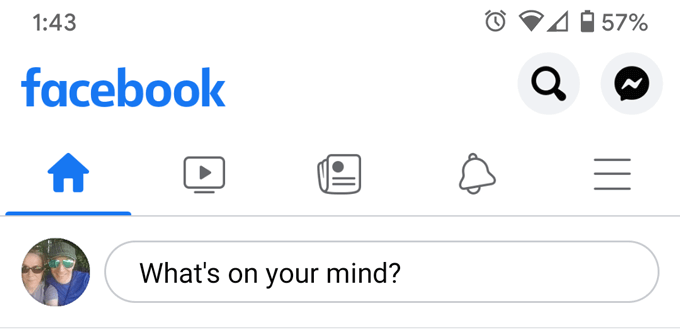
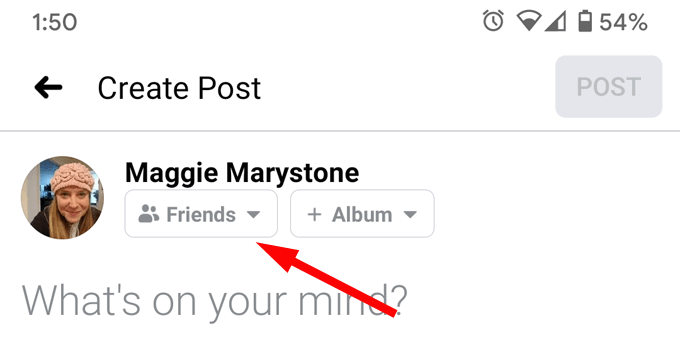
- Open your Facebook app and tap into the “What’s on your mind” field.
- Select the audience dropdown below your profile name.
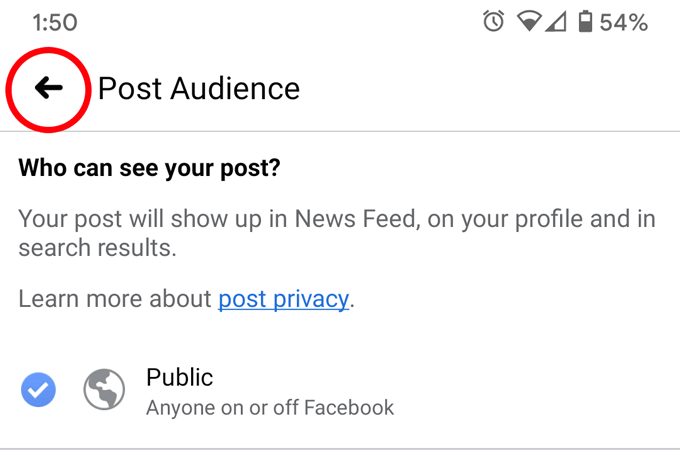
- Next, set your post’s audience to Public.

- Hit the back arrow to return to your post.
- Finally, when you’re finished writing your post, select the Post button, and you’re done!

How to Do a Privacy Checkup on Facebook
If you want all your future posts on Facebook to be set to a public audience, you can change your Timeline’s default settings. The easiest way to do that is to go through Facebook’s Privacy Checkup.
How to Run Facebook’s Privacy Checkup on a Computer
Facebook’s Privacy Checkup is easily-accessible on a desktop browser.
- Log into facebook.com.
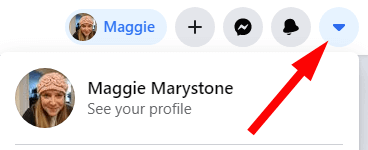
- Click the dropdown arrow in the very top-right corner of the browser window, just to the right of your profile photo.
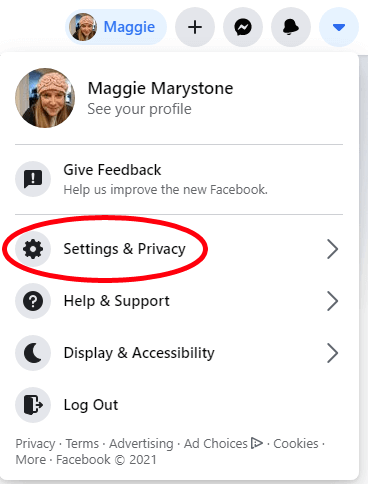
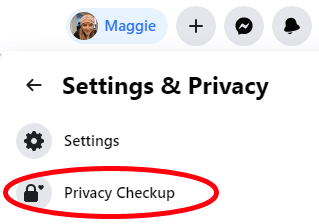
- Select Settings & Privacy.
- Select Privacy Checkup.
- There are lots of options here. To change your default post audience, select Who can see what you share, and Facebook will launch a wizard taking you through all the steps to change who can see your profile information, who can see your posts and stories, and who you have blocked from seeing you on Facebook.

How to Run Facebook’s Privacy Checkup on Mobile
You can launch Facebook’s privacy checkup on mobile, too.
- Open the Facebook app on your mobile device, and login if you’re not already.
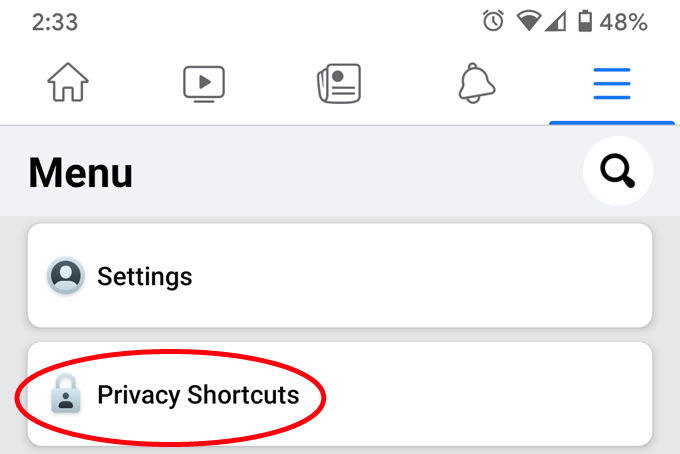
- Select the menu icon to access the main menu. Scroll down until you see Settings & Privacy.

- Next, tap Privacy Shortcuts.
- Select Review a few important privacy settings.

- That takes you to Facebook’s Privacy Checkup. From here, if you want to change your default audience settings, choose Who can see what you share, and proceed through the wizard. The wizard will take you through who can see your profile information, who can see your posts and stories, and who you have blocked from seeing you on Facebook.

You may have noticed that there are multiple places where you can change your privacy settings on Facebook. It’s a good idea to review these settings from time to time, ensuring that your privacy settings are configured the way you want.
Go Forth and Be Shared
Now that you’ve made it easy for other people to share your Facebook posts, you’d better post something worth sharing!
Knowing that “video and animated content does far better than photos when it comes to social networks and the internet in general,” here’s an idea for you: Learn how to make your photos come alive with our article on 6 Ways To Animate Still Photos Online Or With App.
source https://www.online-tech-tips.com/computer-tips/how-to-allow-sharing-on-facebook/